
Long War - March Tactics
In March, XCOM is just a bunch of panicky soldiers that can't shoot straight. No matter. Sectoids are the easiest enemies in the game, and also a lot of fun to fight.

I love March. My soldiers can’t shoot, and they don’t have rockets, and this means that a single engagement can last for several turns, during which I am trying to find a way to negate cover, either by flanking, or getting close enough to use grenades, or just surviving until the Sectoids do something stupid. My squad is weak, but so are the Sectoids; both sides have a bit of leeway. And so March combat is fun.
Another thing I like about March is that I have gotten very good at it, after having restarted so many campaigns. And while it is always frustrating to admit defeat and go back to the beginning, every March brings with it the hope that this time, I’m going to get it right. March isn’t just the start of a new campaign; it is the start of a new season. The winter of failure is over and I can smell spring in the air, and feel the warm glow of meld cannisters, and hear the astonished squeal of Sectoids as they’re blown to pieces.
High Expectations
A long time ago, I was just happy to survive March. But now that I know what I am doing, I have very high expectations. I expect to have zero casualties, all UFOs shot down, and at least one corporal (to build the OTS), by the end of the month. I’m not going to restart if I don’t reach these goals, but they are a good measure of how the month went, and all very achievable. The first mission is usually the hardest, but if I make it through that one unscathed, March has a good chance to be perfect, or near perfect, which will make it much easier to survive April, the scariest month in the calendar, at least for me.
I am playing through an I/I campaign as I write posts about Long War. It makes the writing, as well as the campaign, much more enjoyable. In this campaign I managed a perfect March. Looking through my journal I see that in my previous 3 campaigns I came no where close to meeting my expectations (losing 2-3 soldiers in all 3). Now I am wondering what, if anything, did I do better this time around. Did I play slower, or did I take fewer chances, or was I just lucky? Probably a bit of each. Good luck was present, as I had no swarming abductions and only fought multiple pods on a couple occasions. The most unlucky occurrence was a Sectoid hitting my scout with a 1% shot.
Anyway, that scout survived, and my March was perfect, and the rest of this post is going to me describing how I use grenades, Motion Trackers, and Rocketeers. I am infatuated with Motion Trackers, and Rocketeers to be honest. Also I will talk about the right squad to deal with Outsiders, and what to do when things don’t work out.
Getting in Close with Grenades
With such crap aim, my soldiers are much more effective when using grenades. But it isn’t always easy to get close enough to use them. Sectoids will scamper backwards when they activate, which takes them out of grenade range. So I want to get close before they activate and that means using a wall or roof or some other LOS obstruction, to hide my approach. This allows my squad to use grenades on the first turn of the encounter, and that usually means I win.
Using LOS obstructions to get close is probably the single most important tactic to use on the first mission; in which a squad full of rookies with grenades needs to kill 10 Sectoids. In my current campaign, on the first mission, I accidentally activated 2 pods on the same turn, but was able to pull out a victory because I approached them from behind a train, and thus gained enough proximity to use grenades.
If the enemy activates at long range, I have a harder time getting close. Sometimes I choose to move forward, intending to use grenades on the following turn. Other times I hold or move backward into high cover, and hope the aliens come to me. In deciding between moving forward or backward, my primary concern is whether or not I am likely to activate another pod by moving forward.
The Most Powerful Item in the Game
Motion Trackers are amazing. All they do is detect aliens in a radius that extends 5 tiles beyond visible range, but that knowledge is incredibly powerful. This enables double moving across the map, so that I can acquire meld cannisters. Or it will help me set up an overwatch trap right next to the nearest pod. Or if I am thinking about moving forward during a battle, I may use a Motion Tracker first to verify that this move will not activate another pod. Additionally, they can help locate the command pod of large UFOs, and help determine which pods are moving and which are stationary, and help find a loose Thin Man, and so on. The Motion Tracker is just great in a lot of ways, arguably the most powerful item in the game (for at least the first 5 months, perhaps longer) and I always bring at least 2 along, and build a third one as a back up, and for the covert operative.
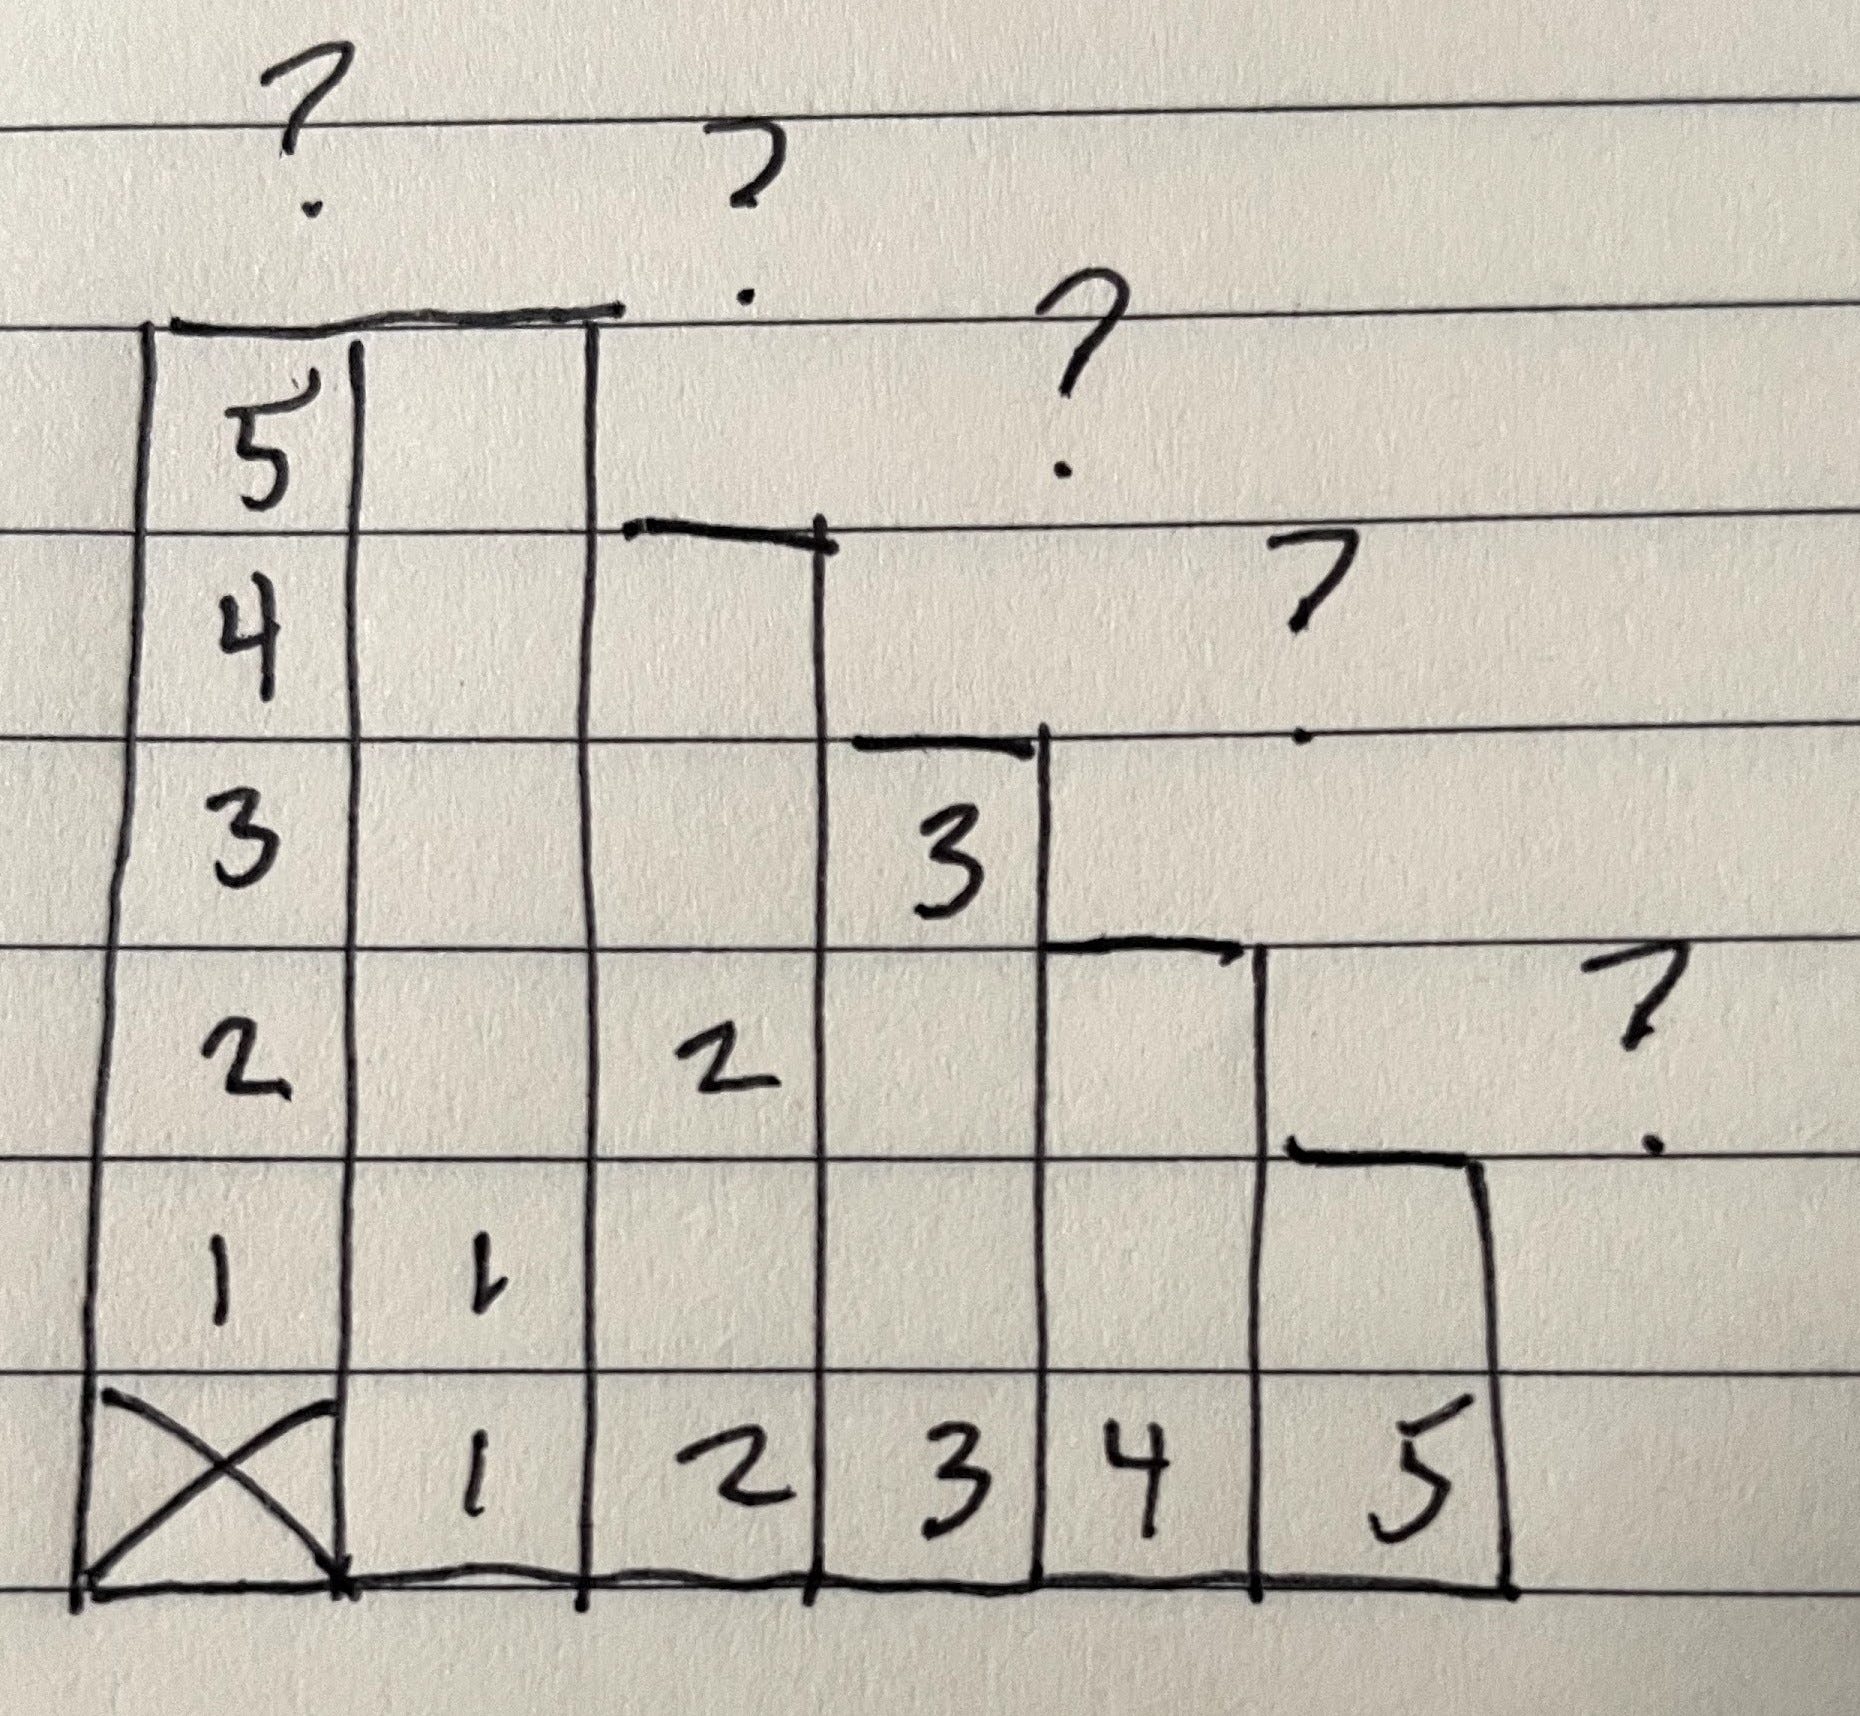
Moving safely with the Motion Tracker is simple. It is safe to move 5 tiles in a straight line or 3 diagonally, without fear of stumbling into a pod. Any move beyond that range is a risk. Here is a crappy illustration of the safe movement range.
Double moving improves the chance of getting meld, but is incompatible with overwatch traps. It is also a more efficient way to use the Motion Tracker to conserve charges.
To double move safely, the soldier with a Motion Tracker can move 5 tiles, then 5 tiles again, and the rest of the squad can then move 5 tiles beyond that final spot, for a total of 15 tiles distance from the original position, supposing that no aliens were detected by the Motion Tracker. I like to carry two of them, and will often have the soldier who has a Motion Tracker, but is not using it this turn, leap frog the soldier who has the activated Motion Tracker, so that the squad can maximize distance travelled on the following turn.
Rocket to Victory
The main objective for March is to get ready for April, and that means leveling up some Rocketeers. This is the only soldiers that can destroy cover at long range during the early game, and that can counter a pod of Thin Men or Floaters. A steadied corporal Rocketeer with Fire in the Hole, will have scatter range a little over 2 tiles and is almost guaranteed to do some good, if not completely solve the problem.
I give Rocketeers an extra rocket and a shredder rocket, and then equip them with an SMG or assault carbine to compensate for lower mobility. This soldier is only doing two things; steadying a rocket, or firing a rocket. And that is more than enough.
A significant cost to developing Rocketeers early is that my squads will be absent Gunners for awhile, which is a big handicap. The Gunner is the next most important class to have in the early game, but leveling them up is not a priority as they are effective even at low ranks.
Outsiders
When loading out a squad to raid a downed UFO I have a very useful checklist:
Gunner
Flashbangs
Assault
Grenadier (with shotgun, 2 HE, 2 AP)
I try to bring everything on that list, but Gunners usually don’t show up in my squads till late in March, so that means for the first few UFOs I am going to be relying upon flashbangs, Assaults and Grenadiers. As long as I manage to approach the UFO safely, that is all I need. An assault cannot guarantee a kill on an Outsider, even with a flank, and so a Grenadier, or any soldier with an AP grenade, is needed to soften him up. If for some reason I can’t reach the Outsider with my Assault or Grenadier, I will need to use flashbangs to keep everyone safe-ish.
Prolonged Battles
Long encounters occur frequently in March, and this is clearly due to the weak offense of both XCOM and the enemy. Sectoids have the same aim as rookies, and do a little less damage. Even in low cover, a rookie is likely to survive a volley of plasma bolts. If my soldiers are in high cover, and the enemy is reinforced by another pod, I will often have engagements that last 3-5 rounds. Smoke is very helpful in these situations, and I like to carry at least 2 smokes on every mission.
In a prolonged battle with 5+ Sectoids, they will pick a soldier to Mindfray repeatedly, and slowly melt his brain. Sometimes there is nothing I can do to save that soldier, but usually the situation is not that bad, because it takes awhile to kill with Mindfray. That means I have time to turn things around. Aside from a bit more urgency, nothing really changes, tactically. I will be looking for a way to grenade the nearest Sectoid, or instead to concentrate fire on a Sectoid in half cover, or turn a flank, or whatever I would normally be doing.
Other Tips for March:
Keep track of which rookies have scored kills during the first mission, as they need a kill to promote.
Rookies need a kill to promote on Abductions and Council Missions. On downed UFOs, rookies will automatically promote even without a kill,
as long as they see the Outsider.1Run & Gun is very powerful, but can get you into trouble if you over use it. Best to save it for emergencies, or when it is safe to move forward. Giving an Assault a smoke is a good way to provide that class with something to do, when they are unable to use Run & Gun.
The Sectoids know that your wounded soldier is in half cover just beyond their LOS, and will move forward just to kill him. Murderous bastards.
Sectoids that are out of LOS will usually either Mind Merge or overwatch. You can count the Mind Merges, and if there are Sectoids unaccounted for, it is a good bet they are on overwatch.
There is a lot of good gear available right from the start. If you never use or equip flashbangs, or smokes, or AP grenades, you are probably doing something wrong.
Sectoids are limited to 5 damage in March, even when they crit. So it is a good idea to have all your soldiers geared to have at least 6 HP, which means giving 3 HP soldiers some plating.
Line-of-Sight Indicators
The Line-of-Sight Indicators Mod will tell you which enemies can be targeted from the tile your cursor is hovering over. This is extremely helpful. It is especially useful for new players that are not aware of all the weird visibility mechanics, or who are accustomed to the quality of life improvements in XCOM 2 and its variants.
Installing the mod is a little complicated. Read the instructions all the way through carefully because the installation depends on which version of XCOM you are playing. Follow the directions precisely, and it will work.
I used this mod the first few times I beat Long War, and would definitely recommend it for new players. In my last campaign, I played without it, and found that positioning units was much trickier, and more mistakes were made.
This post is followed by: Long War - More Early Game Tactics.
Someone on Reddit has convinced me that soldiers do not get bonus XP for sighting the Outsider on UFO missions - Reddit Link