


LW Rebalance - Blogging Brutal v1.42/v1.43 part III
A brief respite.

This post continues from LW Rebalance - Blogging Brutal v1.42 part II. For most of this post I am still running version 1.42, but in mid November I updated to version 1.43.
At the tactical level, the end of the summer feels like a turning point in the campaign. With gauss and pulse technology, our soldiers have the firepower they need, and for a time we are rolling over the aliens. But this doesn’t last. The aliens are always getting stronger, and in a few months, they will start fielding their most dangerous species. For now though, XCOM feels really strong on the ground.
In the skies, things are more precarious. My hangars are strong enough to foil any UFO mission, but the aliens keep sending more and more of them. As those UFOs get sturdier, my hangars suffer more downtime, during which my satellites and high panic countries are vulnerable. And so I have been steadily building up my air force with new foundry projects, and more interceptors, and most importantly, adding a few firestorms.
September
Technology: I’ve been getting numerous Scientist rewards, and have 70 scientists and 3 labs, and so I am just burning through the technology.
Adv. Pulse Lasers
Berserker Autopsy
Mobile Power Armor
MEC Mark 2
Alien Communications
Interrogate Berserker
Engineering: At the start of the month I spend every single penny on campaign level needs (interceptors, satellites, satellite nexus, etc.) and it’s still not enough. I need more cash. Am I running short on funds because I’m speeding through the technologies? Or have I seriously mismanaged something? Looking at my finances I notice that my barracks costs have risen dramatically, and this convinces me to retire a few soldiers immediately, and make plans to retire even more later on. With Gangplank and Furies coming soon, resources should be fine, but money is short.
Sept 1: Satellite Nexus, Satellite x 2, Interceptor x 2 (12 total), Phoenix Cannon x 2
Sept 3: Pulse Carbine, Pulse Scattershot
Sept 5: UFO Tracking, Elerium Batteries
Sept 8: Pulse Autoblaster
Sept 11: Pulse Strike Rifle
Sept 12: Mechanized Defenses, Elerium Afterburners
Sept 15: Pulse Lance
Sept 16: Psi Conduit
Sept 18: Pulse Rifle x 2
Sept 24: HMEC2
Sept 25: Aegis Armor x 3
Sept 27: Grenade Launcher
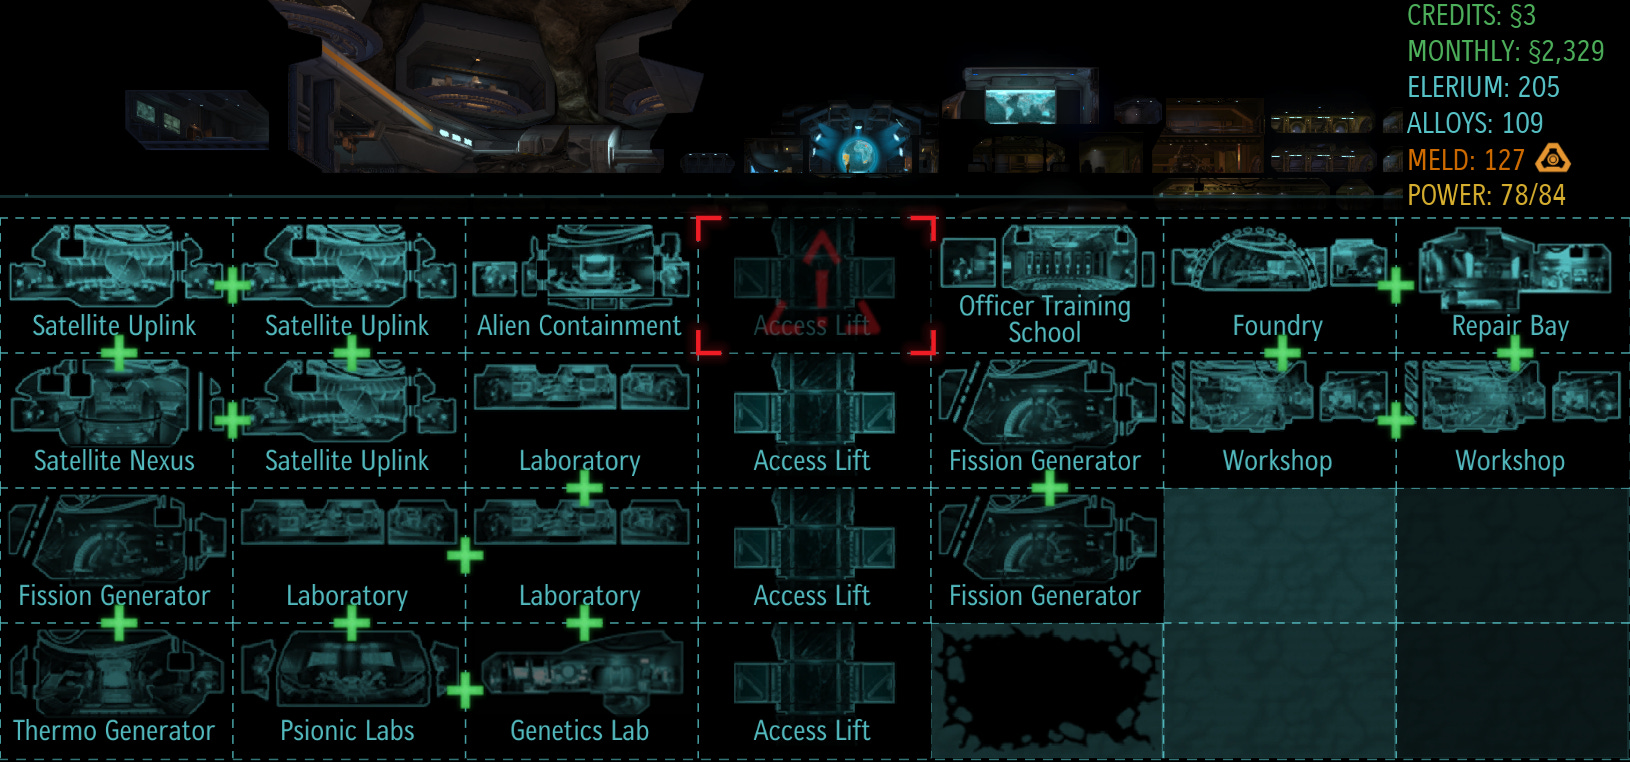
Base Buildout on September 30:
Campaign Notes:
On Sept 5th I have the smoothest Gangplank ever, and finish with zero wounds. The only tough enemies were 2 cyberdiscs. The details of the mission aren’t very interesting or exciting, so I won’t describe it. However, I have listed all the drop-ins in the footnotes, which may prove helpful the next time I run this mission.1
Retired my first soldier on Sept 5. He had 13 missions and so I immediately start getting +5 XP per day. I really should have started doing this sooner…
Furies on Sept 12. This mission was much harder than the last time I ran it. After quickly disposing of a cyberdisc pod, I had 3 pods activate; floaters, more floaters, mechtoid + entourage. I dropped 2 smokes right away (panic smoking), and all that did was cause all the floaters to go on overwatch - Gah. Things are looking really really bad, but I find that both my Scout and Medic have targets at the very edge of their concussion grenade tossing range, and are thus able to collectively hit 4 floaters, breaking most of the overwatches and opening everything up. My sniper takes out another overwatch, which frees up another shooter and so forth. I pick away at the flock of floaters and pop my third and last smoke; but the mechtoid still hits a big shot, wounding my SHIV, and a couple nearby soldiers.
At some point, my wounded Assault runs to the side of the UFO, breaking LOS, so that he can avoid overwatches. This back fires, triggering 2 thin man drop-ins. Oops. Later I am planning to have Annette go for a psi panic on the mechtoid, but first we need to kill the sectoid mind-merged to it. And so the assault springs back into the fray, which reveals, to my horror, a leader thin man (one of the drop-ins probably) well within flanking range, and it looks as though the assault has doomed himself. But fortunately my sniper still has precision shot available and is able to neutralize the threat from across the battlefield. Mayhem Snipers are good. Annette has a 78% chance to psi panic, and it’s so tense - a miss probably means the mechtoid kills someone. But it lands, and that gives me a turn to get my Marauder in range, and focus everyone else on the remaining floaters. This battle is all mopped up with 7 turns still on the clock, and the rest of the mission runs smooth.
On Sept 22 I complete my Satellite Nexus and happily stroll over to the Situation Room to launch a few satellites, where I notice that UK is at 99 panic. When the hell did that happen? The Brits had been sitting at 82 for a month. After thinking it through, I decide to launch a satellite over UK anyway (as well as France), and I also move 4 interceptors to Europe. It’s all for naught; the UK defects on the 24th, taking my satellite with them. What a screw up. My expansion program has been criminally mismanaged.
On the last mission of the month (downed Raider) I learn a few things. Berserkers can single move, then Bull Rush on their second action. This is so brutal. This attack has a ridiculously large range, and does severe damage. Bull Rush? More like Bulls***, amirite?
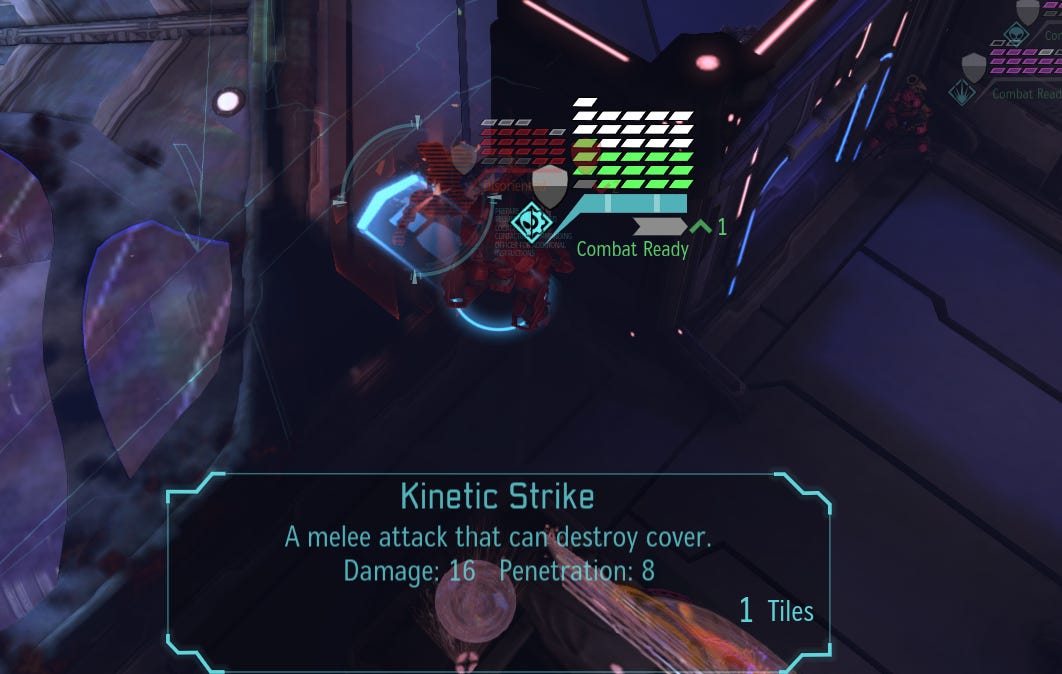
On the positive side, I also learn that the best way to use the KSM against outsiders is to punch them through the wall. It helps avoid their CCS, destroys their cover, and it’s super fun.
Over the course of the month, I retire a bunch of soldiers. Total daily XP gain is at 37.
October
Technology: I had a tough choice between Adv. Power Armor and EMP Weapons at the start of the month. EMP was the right call. I did not obtain the resources to build those expensive armors till mid November.
Then I researched Fighters. This was due to a lack of alloys/elerium and no sectoid commander to interrogate. That bothered me at the time, but after engaging 6 fighters this month, I now think it’s fine. Researching scouts was probably a waste, and should have been avoided.
EMP Weapons UFO Analysis: FightersUFO Analysis: Scouts (because no sectoid commander captured)
Engineering: Somehow I’ve blown through most of the alloy and elerium from Gangplank/Furies. Where the hell did it all go? Whatever, we’ll get more.
I skipped the Targeting Motor and Holo Charger in my previous campaign, but given how hard it is to apply holo, I am building both. These will give me some guaranteed holo when I bring my SHIV.
Oct 1: Interceptor #13, rookie x 3, Jellied Elerium
Oct 2: Firestorm x 2
Oct 3: Psi Grenade, Aurora Armor x 2
Oct 5: Beam Strengthening
Oct 7: Advanced Servo Motors, Targeting Motor
Oct 15: Satellite
Oct 24: EMP Cannon x 2
Base Buildout on October 31: same as previous month.
Campaign Notes: I ran 4 missions in the first 5 days of October, then there is almost no tactical for the rest of the month. On Oct 8 Mexico is the target of a terror attack, which I ignore. By giving up Mexico, I free up an orbit slot, and that means I can take all of Africa, which I do. This boosts my monthly income by 400, and helps consolidate my air force.
Most of the month was spent shooting down UFOs and scrambling interceptors around the globe. 6 fighters were downed; 1 raider and 2 destroyers escaped.
In addition to the free recruit, I bought 3 rookies in October, hoping to get a couple medics. Instead I got three 3 Tactical, and 1 Weapon. Sigh.
At the start of the November I examined the changes to world panic and alien resources.
Situation on Nov 1:

November
Technology: I finally capture a sectoid commander, and it’s way overdue. I had the perfect opportunity to zap one a month ago - just forgot to do it.
Interrogate Sectoid Commander
Heavy Floater Autopsy
Antigrav Systems
Muton Elite Autopsy
Engineering: I’ve been putting off workshop 3/4 for too long. Should have built them right after acquiring the Africa continent bonus. I need a temporary Fission Gen to get started on the 4th workshop because my elerium generator is going to take awhile to finish. And I am back to zero dollars by mid month.
Nov 1: Interceptor x 2 (15 total), Majors
Nov 6: Elerium Generator (timed for Dec 1)
Nov 8: Phoenix Cannon x 2
Nov 9: Alloy SHIV
Nov 10: Fission Gen, Workshop #3
Nov 11: Pulse Strike Rifle
Nov 15: Alloy SHIV
Nov 17: Workshop #4
Nov 20: Alloy Carbide Plating x 2
Nov 22: Chameleon Vest x 2
Nov 27: Corsair Armor
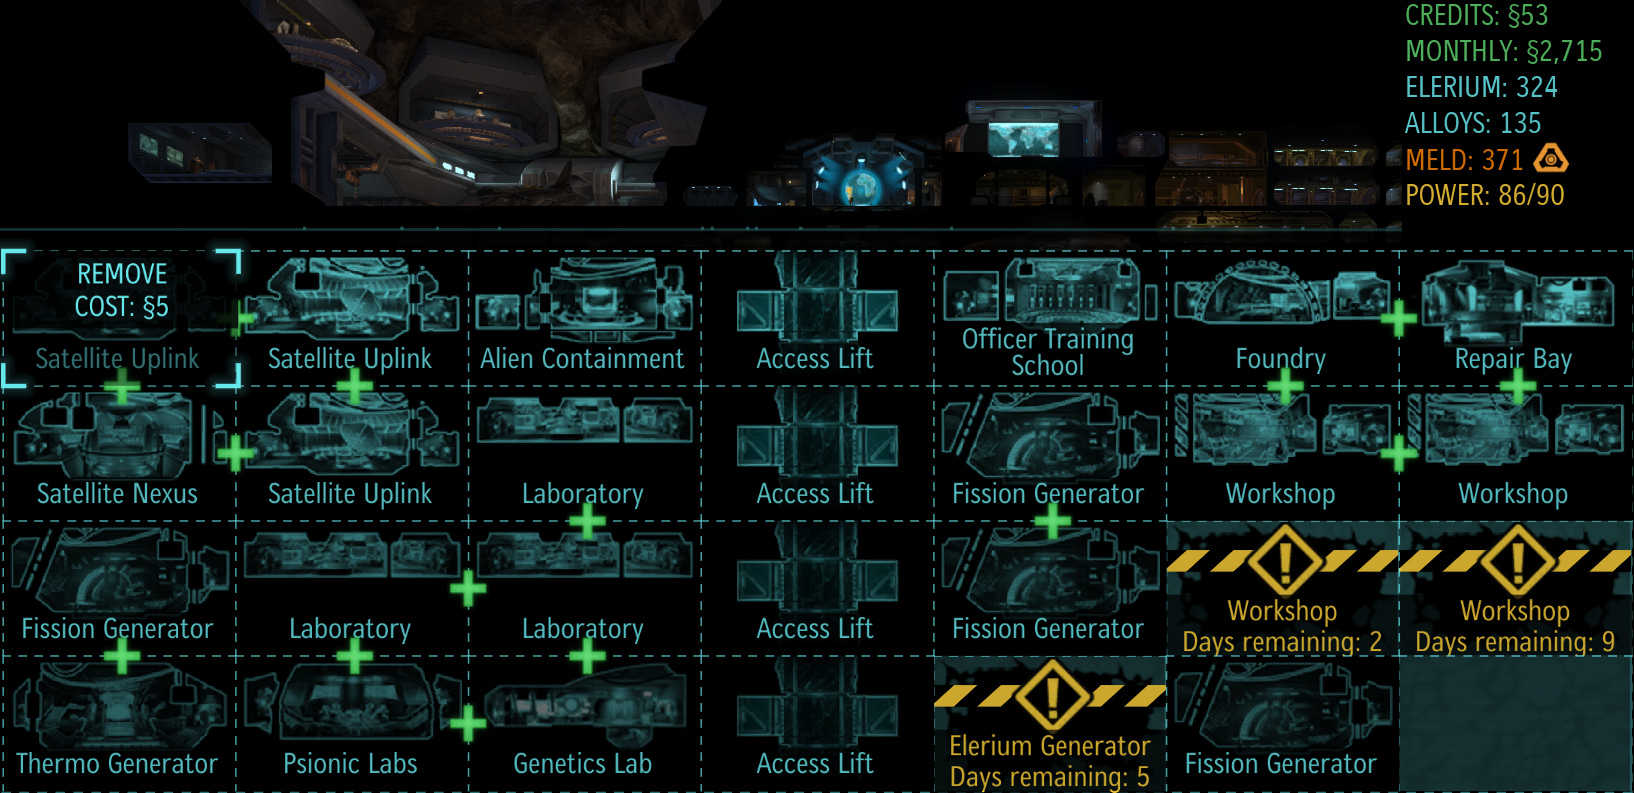
Base Buildout on November 30:
Campaign Notes: The month starts off with another terror mission in Argentina. It has a decent enemy draw, and so it all goes well.
I run a combat patrol with my Commander EMP Firestorm and the results are glorious. about -15 panic in each of the hard pressed european countries. That will buy me 2 bombing runs.
I down a raider on the 9th, and it’s exactly what I have been hoping for. My two biggest needs right now are a sectoid commander capture and more resources. I get both. There was one significant casualty on this mission - I lost my first SHIV while fighting the outsider pod. Engineer leaders are no joke. Note: I tried to maim the commander but both shots did zero damage because of distortion.
—This is where I update to version 1.43—
The first landed large was offered on November 10th; 19 enemies, AL 6 (8)++. Because of the low enemy count I decide to go for it. We get a very reasonable enemy draw: sectoid commander, mutons, sectoid commander, outsiders, outsiders. I take the mission very slow, and we make it through with only a few wounds.
The next mission is Marazuki. I’ve always fought this mission out, rather than cheesing it. This time, I’d like to try and sneak my way through. The problem is that I’ve heard conflicting reports about whether you should sneak along the left or right side of the map, and I’m worried that I won’t do it right, regardless of which direction I go. I don’t want to screw up this campaign which is going really well, so I decide to give myself a couple test runs before doing the “real” mission, which is kind of cheating totally okay because it’s for educational purposes.
The cheese tasting (which I elaborate upon at the end of this post) suggests that left is the better option - but left looks really bad on the real mission. The motion tracker reveals a pod over by the tanks, and my scout confirms this when he moves to the adjoining room on the left. Unhappily I decide to go right. I’m feeling sick to my stomach as I move most of my squad under the stairway near the dangerous intersection. I see 2 thin men drop on the opposite building, once again blocking my squad from getting any closer. I give Marazuki the best spot as he is the slowest. I have to wait one extra turn for my scout to catch up, and the whole map activates before I start my dash. What a nightmare. My SHIV dutifully stays behind to sacrifice itself for the greater good while Marazuki and the rest of my squad dash all the way under the opposite stairway and out of LOS. Is this going to work? The SHIV doesn’t last long against a berserker + chryssalids pod, but no enemy units round the corner. Next turn I move to the other side of the building, and again, no enemies are in sight. The next turn we are out, minus a SHIV, but with bonus money.
On the the 19th the aliens send 3 UFOs to France, in the same 6 hour period. I send all 5 of my aircraft at the first UFO (a fighter bombing run) and so they are refueling when the next 2 UFOs arrive. It’s really frustrating, but luckily the UFO on a hunting mission doesn’t shoot down my satellite, and the bombing run doesn’t push panic over 80.
On the 22nd I down a Raider, and take a solid team but draw some very nasty enemies on a small map. The mission starts with a battle against a small pod (sectoid commander + 1 sectoid) and the command pod (1 outsider leader + 3 outsiders). Just as I am finishing this battle, another pod (2 sectoid commanders + 4 sectoids) activates on my flank. Some of my guys are out of ammo, or in a bad position and unable to reposition quickly due to overpower. But this still looks manageable, as it stands. The problem is that the motion tracker reveals another large pod just behind this one, and if they activate, I will be fighting a large cohort of enemies. Well, they do activate on the next turn, and it’s actually 2 pods (3 cyberdiscs + 2 seekers + 5 drones).
So things are looking very grim. It’s hard to kill sectoid commanders with their entourage absorbing much of the damage, so I start off by killing all the little sectoids, but don’t have enough firepower afterwards to kill either sectoid commander. However I do manage to group up all of my forward units in a cloud of smoke and I am feeling okay about this next turn…
Two cyberdiscs shoot at my Infantry officer (half cover w/smoke; ~40% shots); both hit, killing him outright.
And from there it only got messier. My medic was mind controlled for 2 turns which he spent shooting his squadmates with his pistol. The rocketeer was mind frayed and couldn’t fire a rocket (or do much else) for 2 turns. Overpower turned my goliath into a slug, and he could only punch aliens on every other turn. The sniper was actually missing shots. Just an ugly brutal brawl. I was saved by my newly minted alloy SHIV which tanked shots from 2 cyberdiscs for 3 turns. Also, the 3rd cyberdisc stayed away until the very end of the battle, and that’s probably why no one else died.
There were a couple more abductions at the end of the month, one of which ended up in a similar morass because of multiple sectoid commanders. I haven’t done any gene modding yet - I’m waiting to acquire all the mods. In the meanwhile all my soldiers are susceptible to mind control.
I down my first Destroyer at the end of the month, with 0.1 seconds to spare.

The whole hangar is beat to hell. But now if I run out of technologies, I can use the extra research on UFO Analysis: Destroyers.
Marazuki Cheese Tasting
Let’s taste the cheese. The first test I go right, and it’s a complete disaster. My squad moves out of the lab and under the stairway just before the dangerous intersection. A thin man drops on the roof of the building across the way, which means I will not be able to move my squad any closer before I have to dash across to the other building. On the enemy’s turn, 3 pods activate. So the plan is to sacrifice the SHIV and dash everyone else to safety, but Marazuki is too slow, and he can’t make it all the way across and under the stairway of the other building. I think there was a sectoid commander and so perhaps this is due to overpower. I also didn’t put him as far forward as I could have. He dies and test 1 is over.
EDIT: Some other players have advised on how to go right effectively - You need to stack up your soldiers inside the little room nearest to the intersection. You want Marazuki closest to the door as he is the slowest, and this requires 2 turns to set up. Then dash him across first - he will get a bonus action when enemies activate, and that will help him keep up. Then move all your soldiers over to the far wall of the building near the drop site. Out on turn #5.
The second test I go left and it’s much smoother. I stack up the squad near the doorway of the room on the left, without making any sound. The motion tracker shows a few enemies along this route, but they seem to be in the little repair building, so it still looks safe. The next turn my squad moves behind the tanker, and I’m still good. Then behind the repair building and we’re still good, but the motion tracker tells me there are 3 pods nearby, and so I am really worried about crossing this last intersection. My scout throws a battle scanner between the repair shop and the big rig and no enemies are visible, which seems miraculous. There are enemies all around that intersection, but none of them have LOS due to all the high cover objects. On the next turn I safely move my squad behind the big rig, and on the next turn we get away clean.
Gangplank Drop-ins: I believe the location of the drop-ins is somewhat random, but when/how they are triggered is consistent.
Entering 1st room: 2 thin men; 1 at landing site, 1 at right tower just past first conduit.
Fighting pods in 1st room: 1 thin man at landing site.
Moving forward a bit: 1 chryssalid at middle tower past first conduit.
Activate 1st conduit: 1 thin man + 1 sectoid, both at landing site.
After engaging in 2nd area: 1 chryssalid back near 1st conduit.
After going through double doors: sectoid on walkway above.
Near conduits 3/4: thin man + muton, each on a high ledge in last room.
Into last room: thin man in last room top right ledge.
Activate conduits 3/4: 2 thin man, one behind on towers, one walkway above.